mirror of https://github.com/axmolengine/axmol.git
|
|
||
|---|---|---|
| .. | ||
| .settings | ||
| jni | ||
| res | ||
| src/org/cocos2dx/cpp | ||
| .classpath | ||
| .cproject | ||
| .project | ||
| AndroidManifest.xml | ||
| README.md | ||
| ant.properties | ||
| build-cfg.json | ||
| build.xml | ||
| build_native.py | ||
| proguard-project.txt | ||
| project.properties | ||
README.md
Prerequisites:
- Android NDK
- Android SDK OR Eclipse ADT Bundle
- Android AVD target installed
Building project
There are two ways of building Android projects.
- Eclipse
- Command Line
Import Project in Eclipse
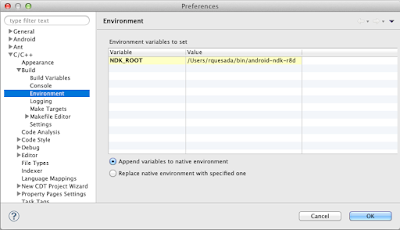
####Step 1: C/C++ Environment Variable NDK_ROOT
- Eclipse->Preferences->C/C++->Build->Environment.
- Click Add button and add a new variable
NDK_ROOTpointing to the root NDK directory.
- Only for Windows: Add new variables CYGWIN with value
nodosfilewarningand SHELLOPTS with valueigncr
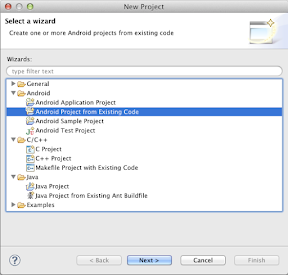
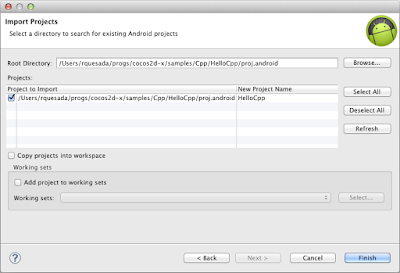
####Step 2: Adding and running from Eclipse
- File->New->Project->Android Project From Existing Code
- Browse to your project directory and Add the project
- Click Run as Android Application to run on connected device or emulator.
That's all !!!
Running project from Command Line
$ cd NEW_PROJECTS_DIR/MyGame
$ cocos run -p android -j 4

