mirror of https://github.com/axmolengine/axmol.git
|
|
||
|---|---|---|
| .. | ||
| jni | ||
| res | ||
| src/org/cocos2dx/cpp_tests | ||
| .classpath | ||
| .project | ||
| AndroidManifest.xml | ||
| README.md | ||
| ant.properties | ||
| build-cfg.json | ||
| build.xml | ||
| ndkgdb.sh | ||
| proguard-project.txt | ||
| project.properties | ||
README.md
Prerequisites:
- Android NDK
- Android SDK OR Eclipse ADT Bundle
- Android AVD target installed
Building project
There are two ways of building Android projects.
- Eclipse
- Command Line
Import Project in Eclipse
Features:
- Complete workflow from Eclipse, including:
- Build C++.
- Clean C++.
- Build and Run whole project.
- Logcat view.
- Debug Java code.
- Javascript editor.
- Project management.
- True C++ editing, including:
- Code completion.
- Jump to definition.
- Refactoring tools etc.
- Quick open C++ files.
Setup Eclipse Environment (only once)
NOTE: This step needs to be done only once to setup the Eclipse environment for cocos2d-x projects. Skip this section if you've done this before.
-
Download Eclipse ADT bundle from Google ADT homepage
OR
Install Eclipse with Java. Add ADT and CDT plugins.
-
Only for Windows
- Install Cygwin with make (select make package from the list during the install).
- Add
Cygwin\bindirectory to system PATH variable. - Add this line
none /cygdrive cygdrive binary,noacl,posix=0,user 0 0toCygwin\etc\fstabfile.
-
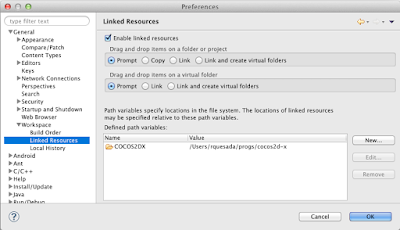
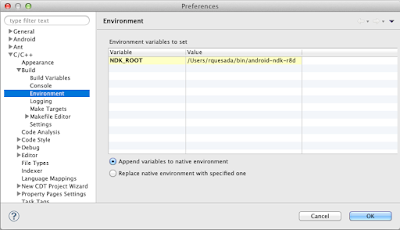
Set up Variables:
-
Path Variable
COCOS2DX: -
C/C++ Environment Variable
NDK_ROOT:
-
-
Import libcocos2dx library project:
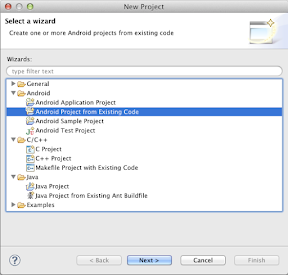
- File->New->Project->Android Project From Existing Code.
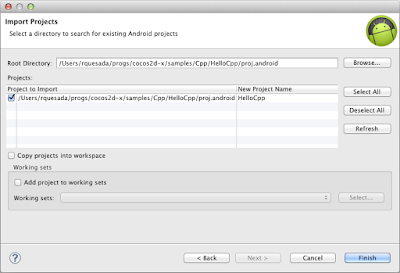
- Click Browse button and open
cocos2d-x/cocos2dx/platform/android/javadirectory. - Click Finish to add project.
Adding and running from Eclipse
- File->New->Project->Android Project From Existing Code
- Browse to your project directory. eg:
cocos2d-x/cocos2dx/samples/Cpp/CppTests/proj.android/ - Add the project
- Click Run or Debug to compile C++ followed by Java and to run on connected device or emulator.
Running project from Command Line
$ cd cocos2d-x/samples/Cpp/CppTests/proj.android/
$ export NDK_ROOT=/path/to/ndk
$ ./build_native.sh
$ ant debug install
If the last command results in sdk.dir missing error then do:
$ android list target
$ android update project -p . -t (id from step 6)
$ android update project -p cocos2d-x/cocos2dx/platform/android/java/ -t (id from step 6)


